Vivo X300 Camera Settings: 8 Changes That Actually Work
8 Vivo X300 camera settings that make a real difference.
Yaskar Jung Shah
Senior Tech Writer

Key Takeaways
8 Vivo X300 camera settings that make a real difference.
Vivo X300 Camera Settings: 8 Changes That Make a Real Difference
Most smartphones, including the Vivo X300, are set up for convenience by default, not for the highest image quality. The default mode is fine for quick photos, but it does not take full advantage of ZEISS optics or AI processing.
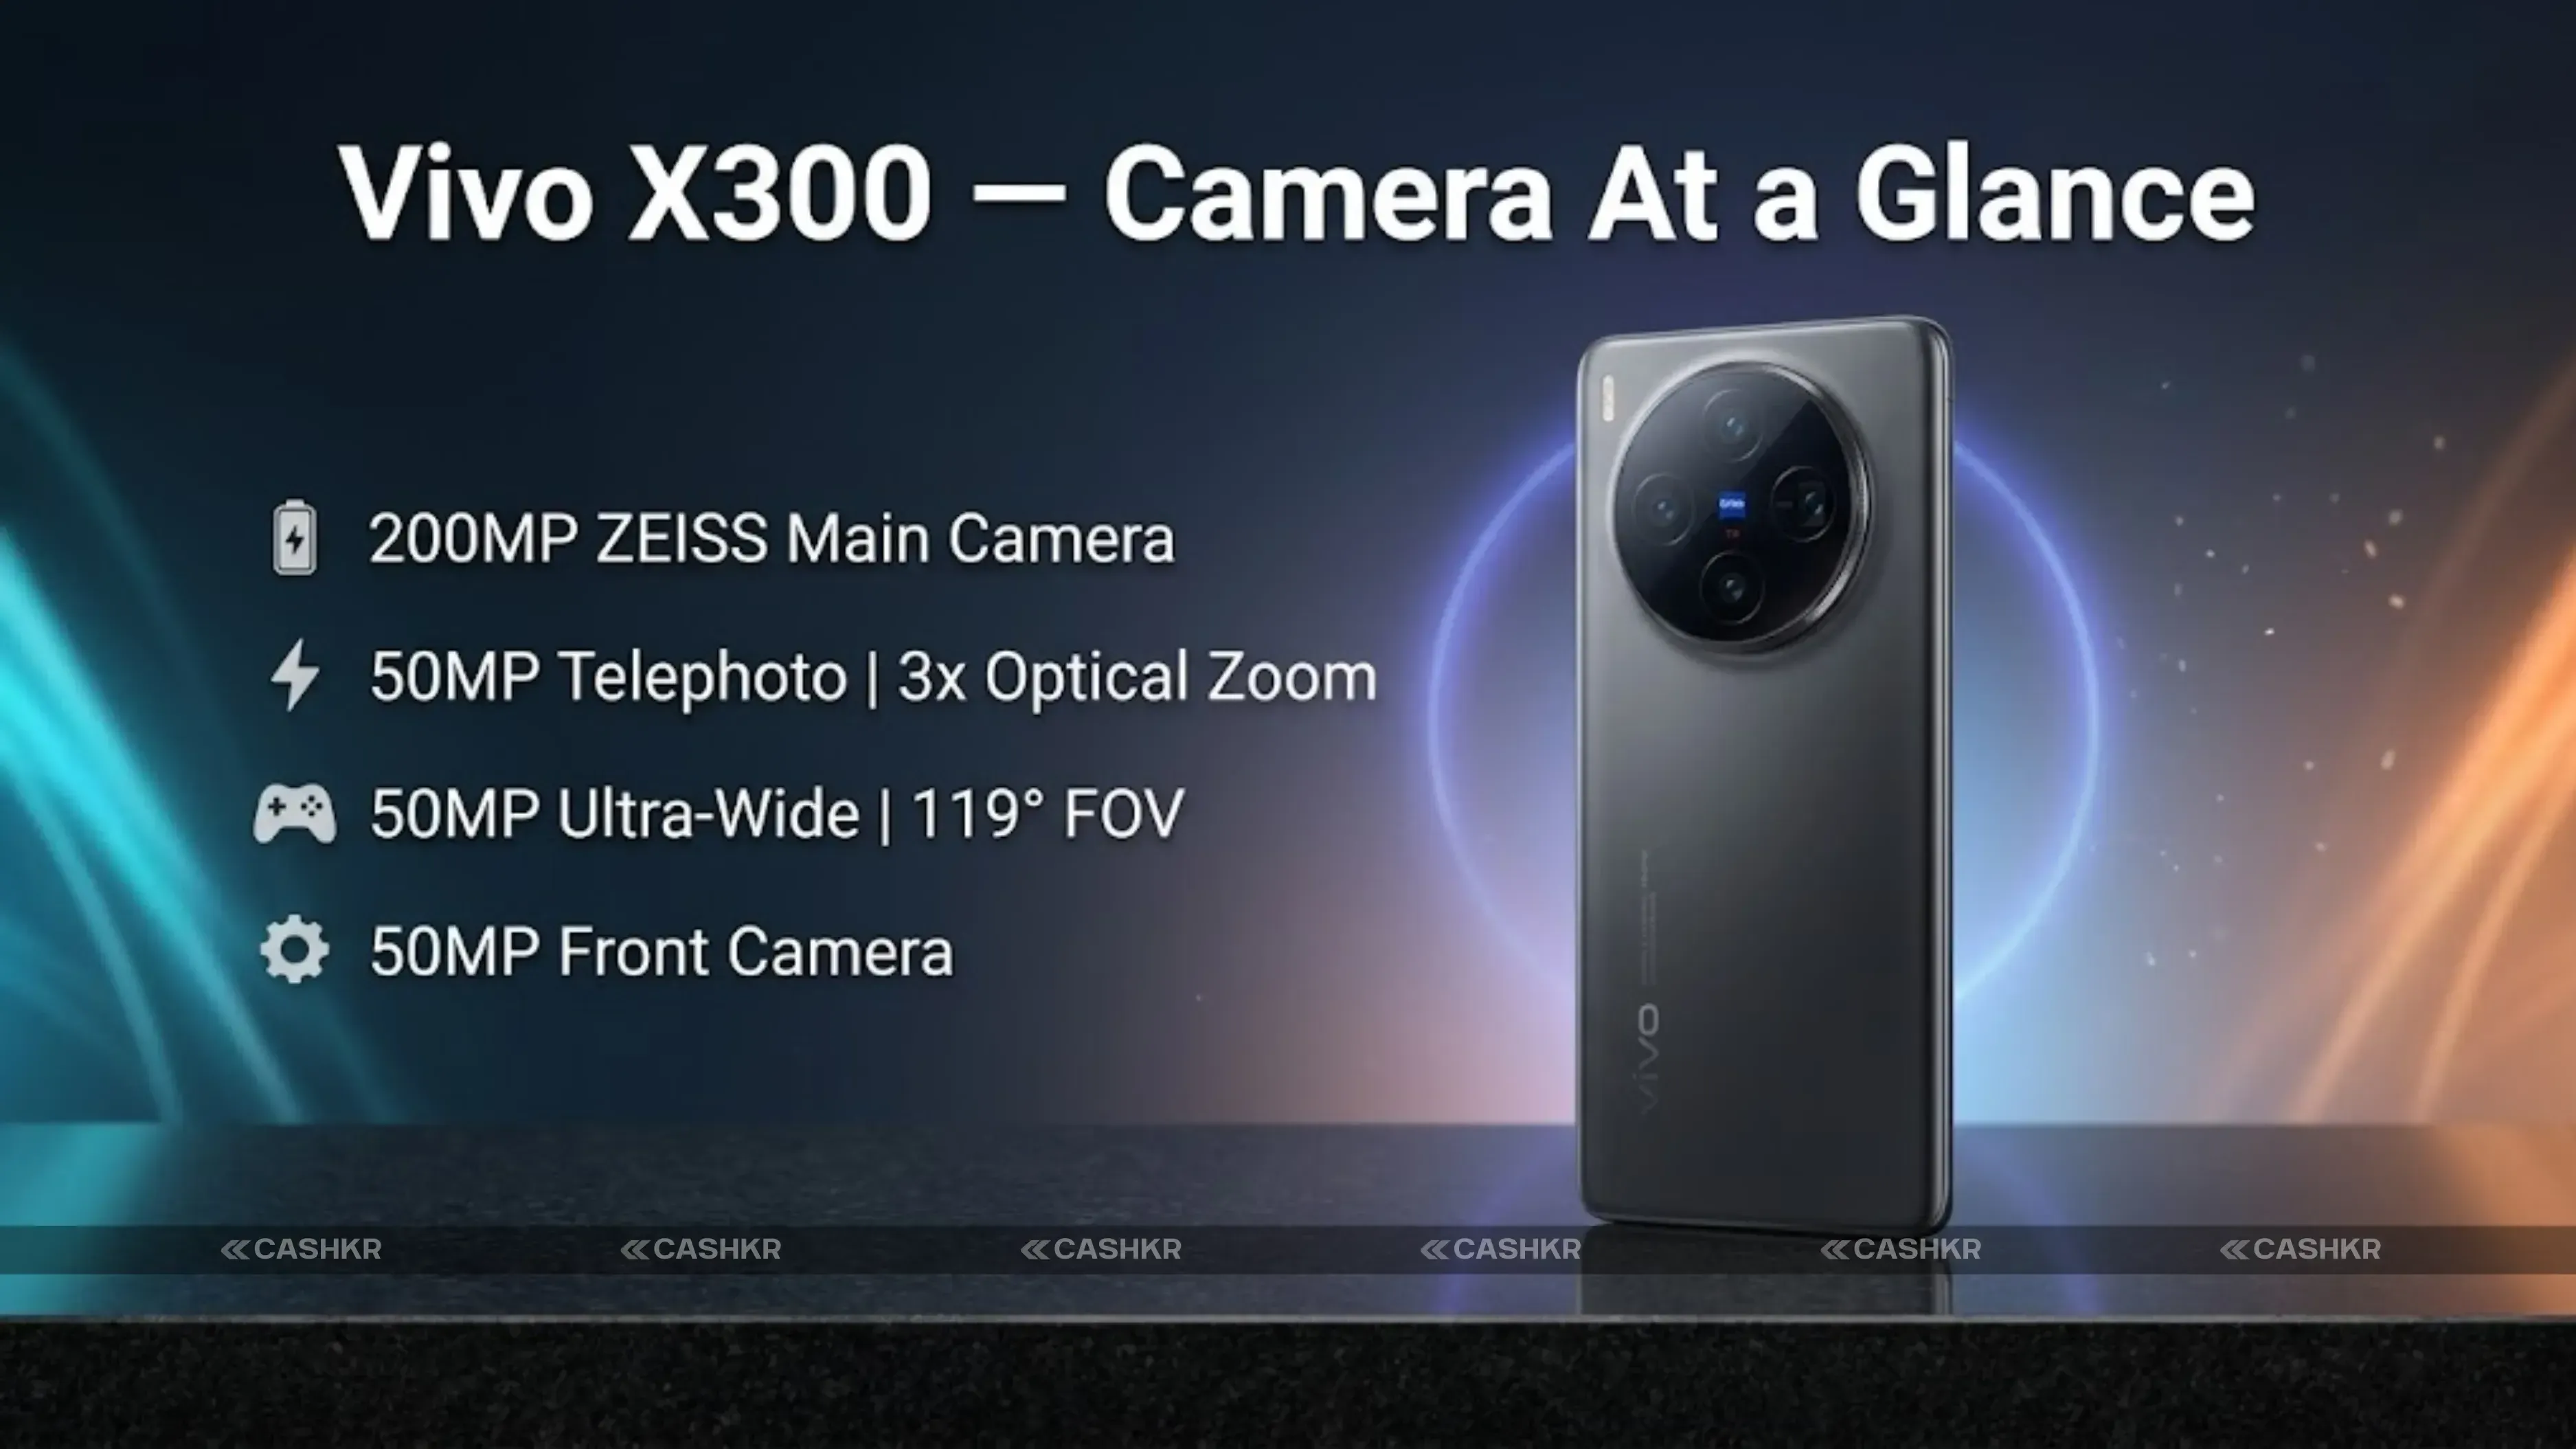
Camera specs: 200MP ZEISS main camera | 50MP periscope telephoto (3x optical) | 50MP ultra-wide (119-degree field of view) | 50MP front camera | Default shooting resolution: 12.5MP pixel-binned for better quality
Understanding the Default 12.5MP Setting
Save 200MP for specific use cases covered in Setting 3 below. For everything else, the default 12.5MP output is the right choice.
To put it simply, pixel binning is like having 16 people measure a room and then averaging their results. The average is more accurate than any single measurement. The Vivo X300 combines 16 pixels into one for its 12.5MP photos, which leads to richer and more accurate images.
Also Read: Realme 16 5G India Launch: Expected Price, Specs & Features
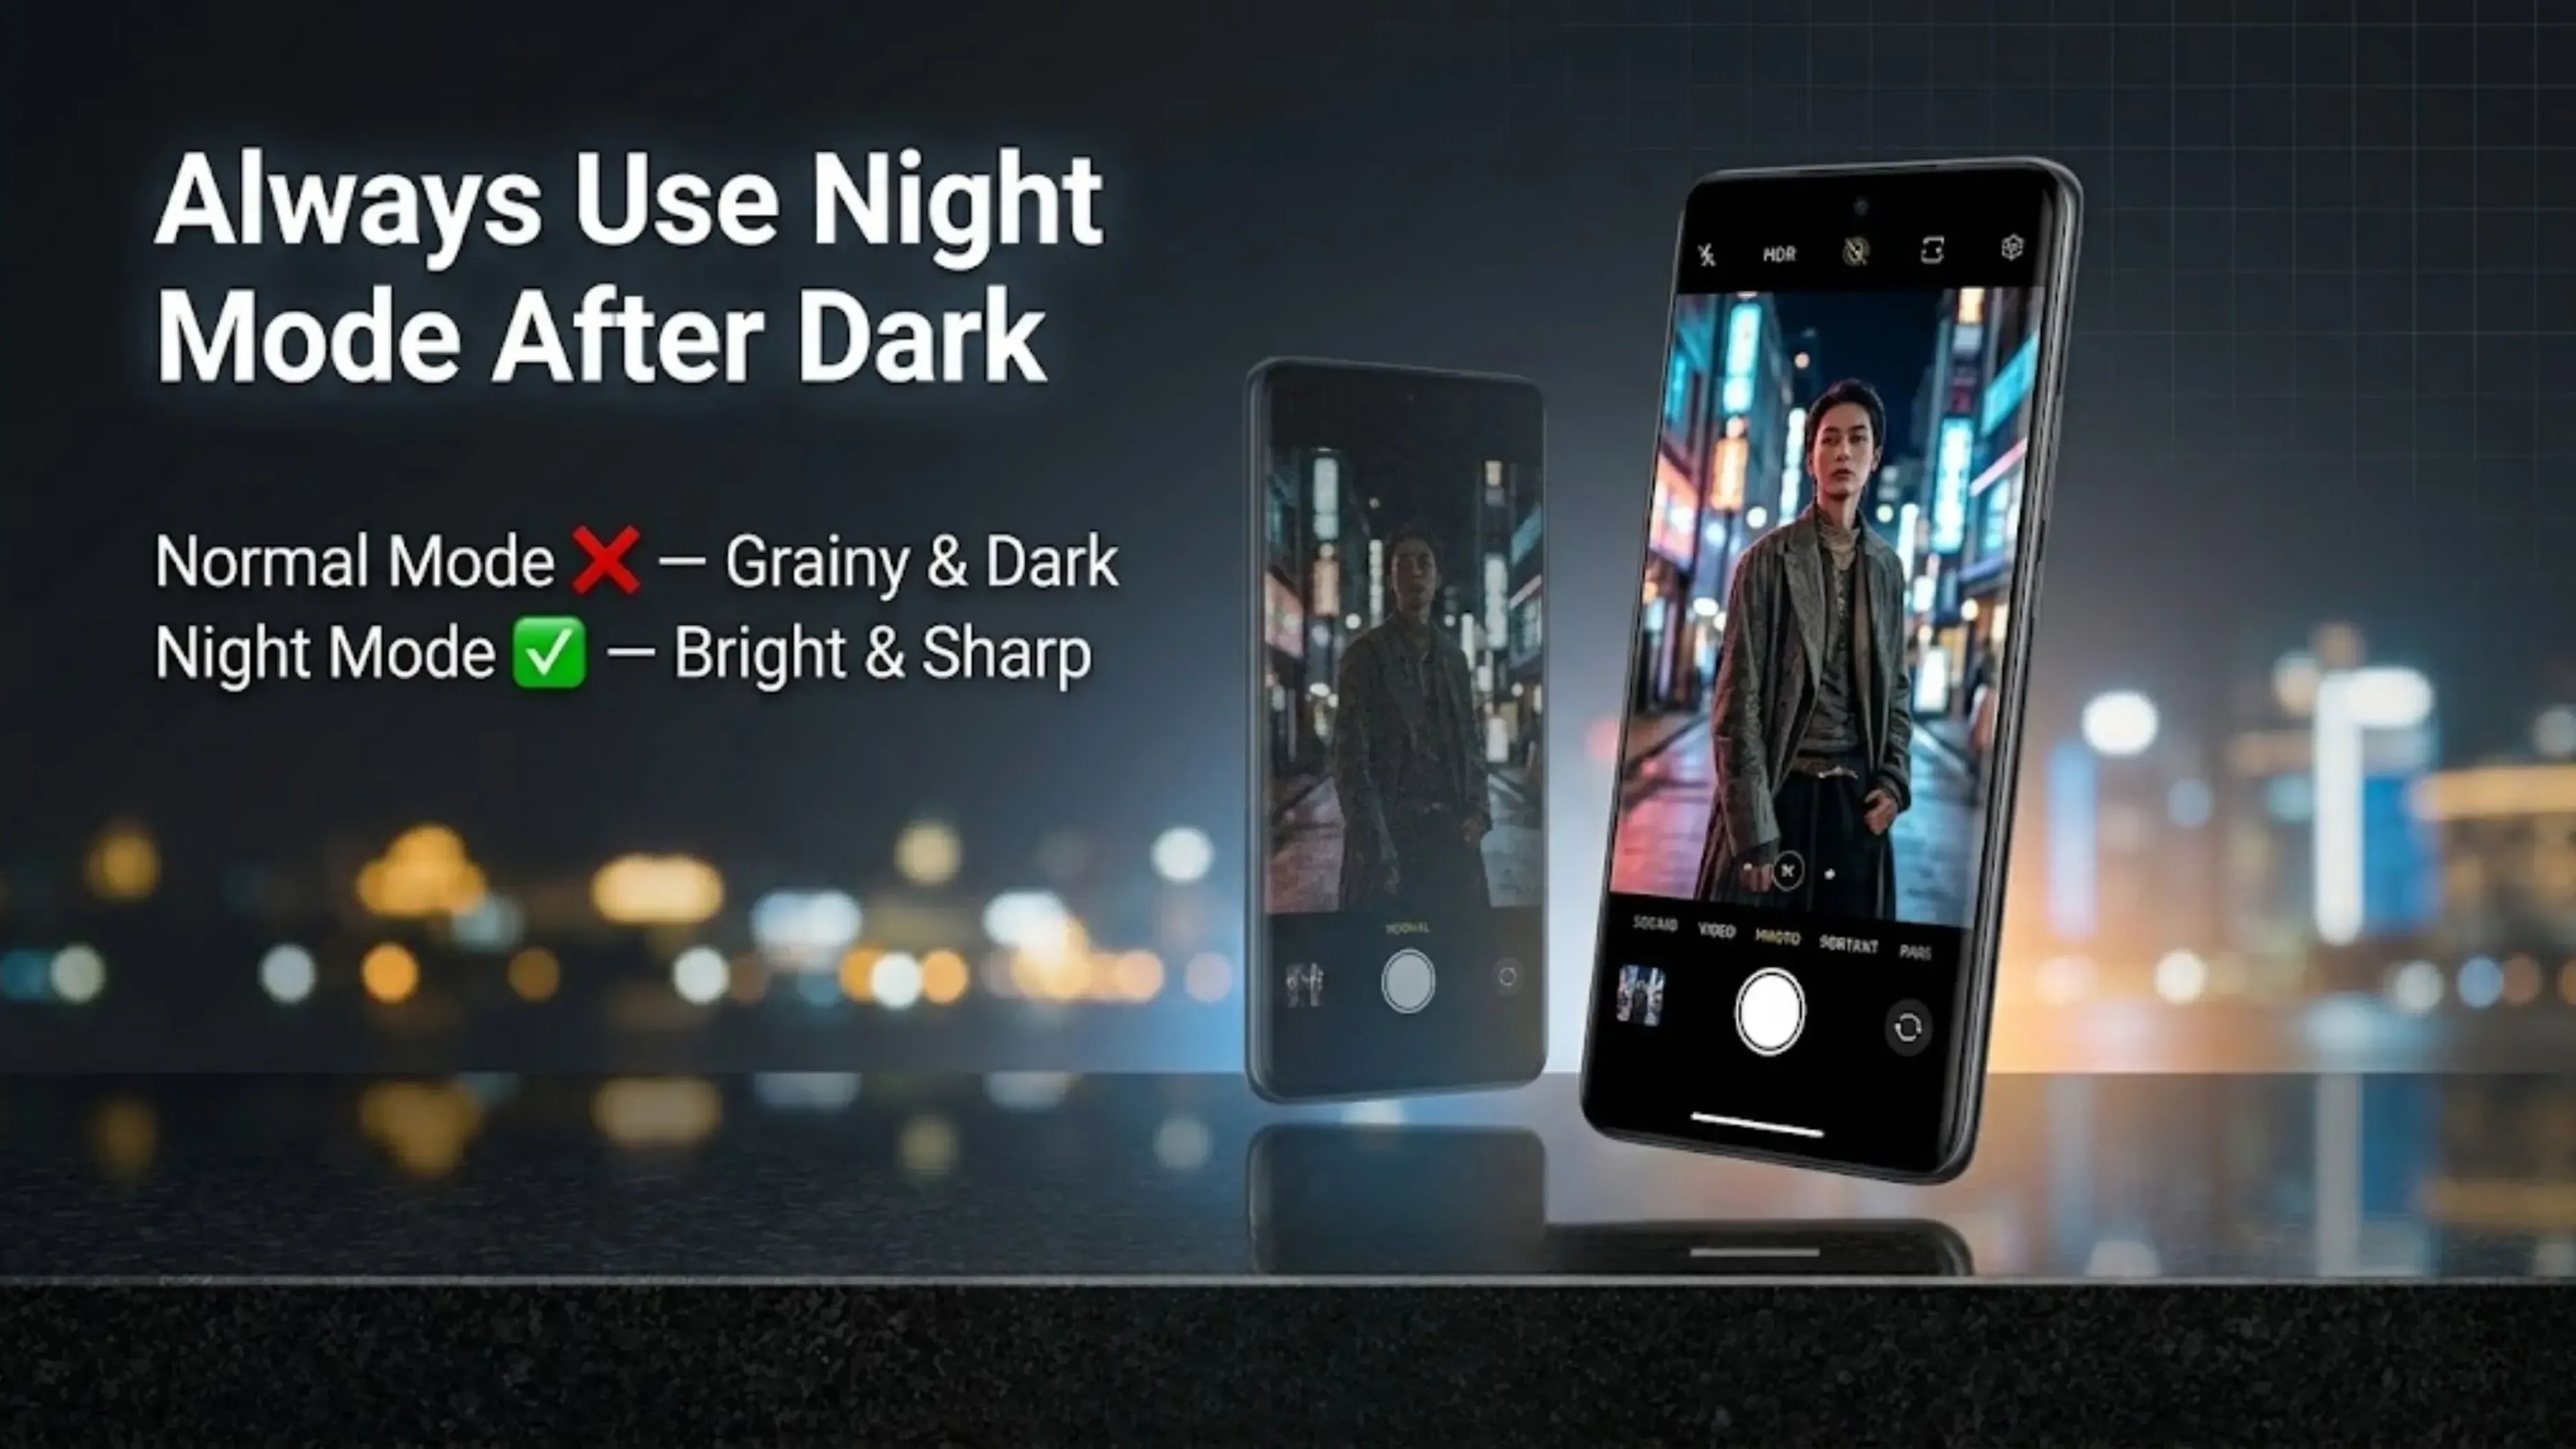
Setting 1: Night Mode for Any Low-Light Situation
Setting 1 Night Mode Switch to Night Mode in any dim environment. Hold the phone steady for 1 to 3 seconds while it processes. The longer it has, the cleaner the result.
Night Mode vs standard mode: In low light, Night Mode can produce photos that look like they were shot with a professional camera on a tripod. In standard mode, the same scene produces noisy, dark images with blown highlights. Always choose Night Mode after sunset or in indoor locations.
Setting 2: AI Scene Optimisation for Everyday Shooting
When it’s on, the phone’s AI looks at the scene before you take a photo and automatically adjusts things like color, contrast, sharpness, exposure, and white balance. For example, it makes forests look greener, food look warmer and more detailed, and buildings look sharper.
If you like editing your photos later, turn off AI Scene Optimisation to get a more neutral image that’s easier to work with in Lightroom or Snapseed. If you want great photos straight from the camera, just leave it on.
Setting 2 AI Scene Optimisation Go to Camera Settings and ensure AI Scene Optimisation is toggled on. For Lightroom editors who prefer a neutral base, turn it off.

Also Read: iQOO Z11 Specs and Price: Best Gaming Phone Under Rs. 35K
Setting 3: Ultra HD 200MP Mode and When to Actually Use It
Setting 3 Ultra HD 200MP Open the camera app and tap the resolution selector at the top. Choose Ultra HD for documents, detailed landscapes, or large-print photography. Switch back to the default for everything else.
Be careful with storage: one 200MP photo can be over 50MB. If you shoot in 200MP mode all the time, your storage will fill up fast. Only use it when you really need that much detail.

Also Read: iQOO Z11 Specs and Price: Best Gaming Phone Under Rs. 35K
Setting 4: Portrait Mode Focal Length Selection
The 50mm focal length is the classic choice for portraits. It keeps faces looking natural, with little distortion, and gives a smooth background blur. This is the best option for most portrait photos.
Setting 4 Portrait Focal Length In Portrait mode, tap the focal length selector. Choose 50mm for natural everyday portraits. Choose 85mm for flattering professional-style shots. Never use ultra-wide for faces.
Here’s a quick tip: if someone feels self-conscious about their appearance, use the 85mm setting. The slight compression makes faces look more balanced, and the stronger background blur helps the subject stand out.
Setting 5: Micro Movie Mode for Reels and Short-Form Content
This mode gives you AI-powered framing tips to help you create videos that look great.
Setting 5: Micro Movie Mode. Find Micro Movie in the shooting mode selector. Use it when creating content specifically for Instagram Reels, YouTube Shorts, or similar vertical video platforms.
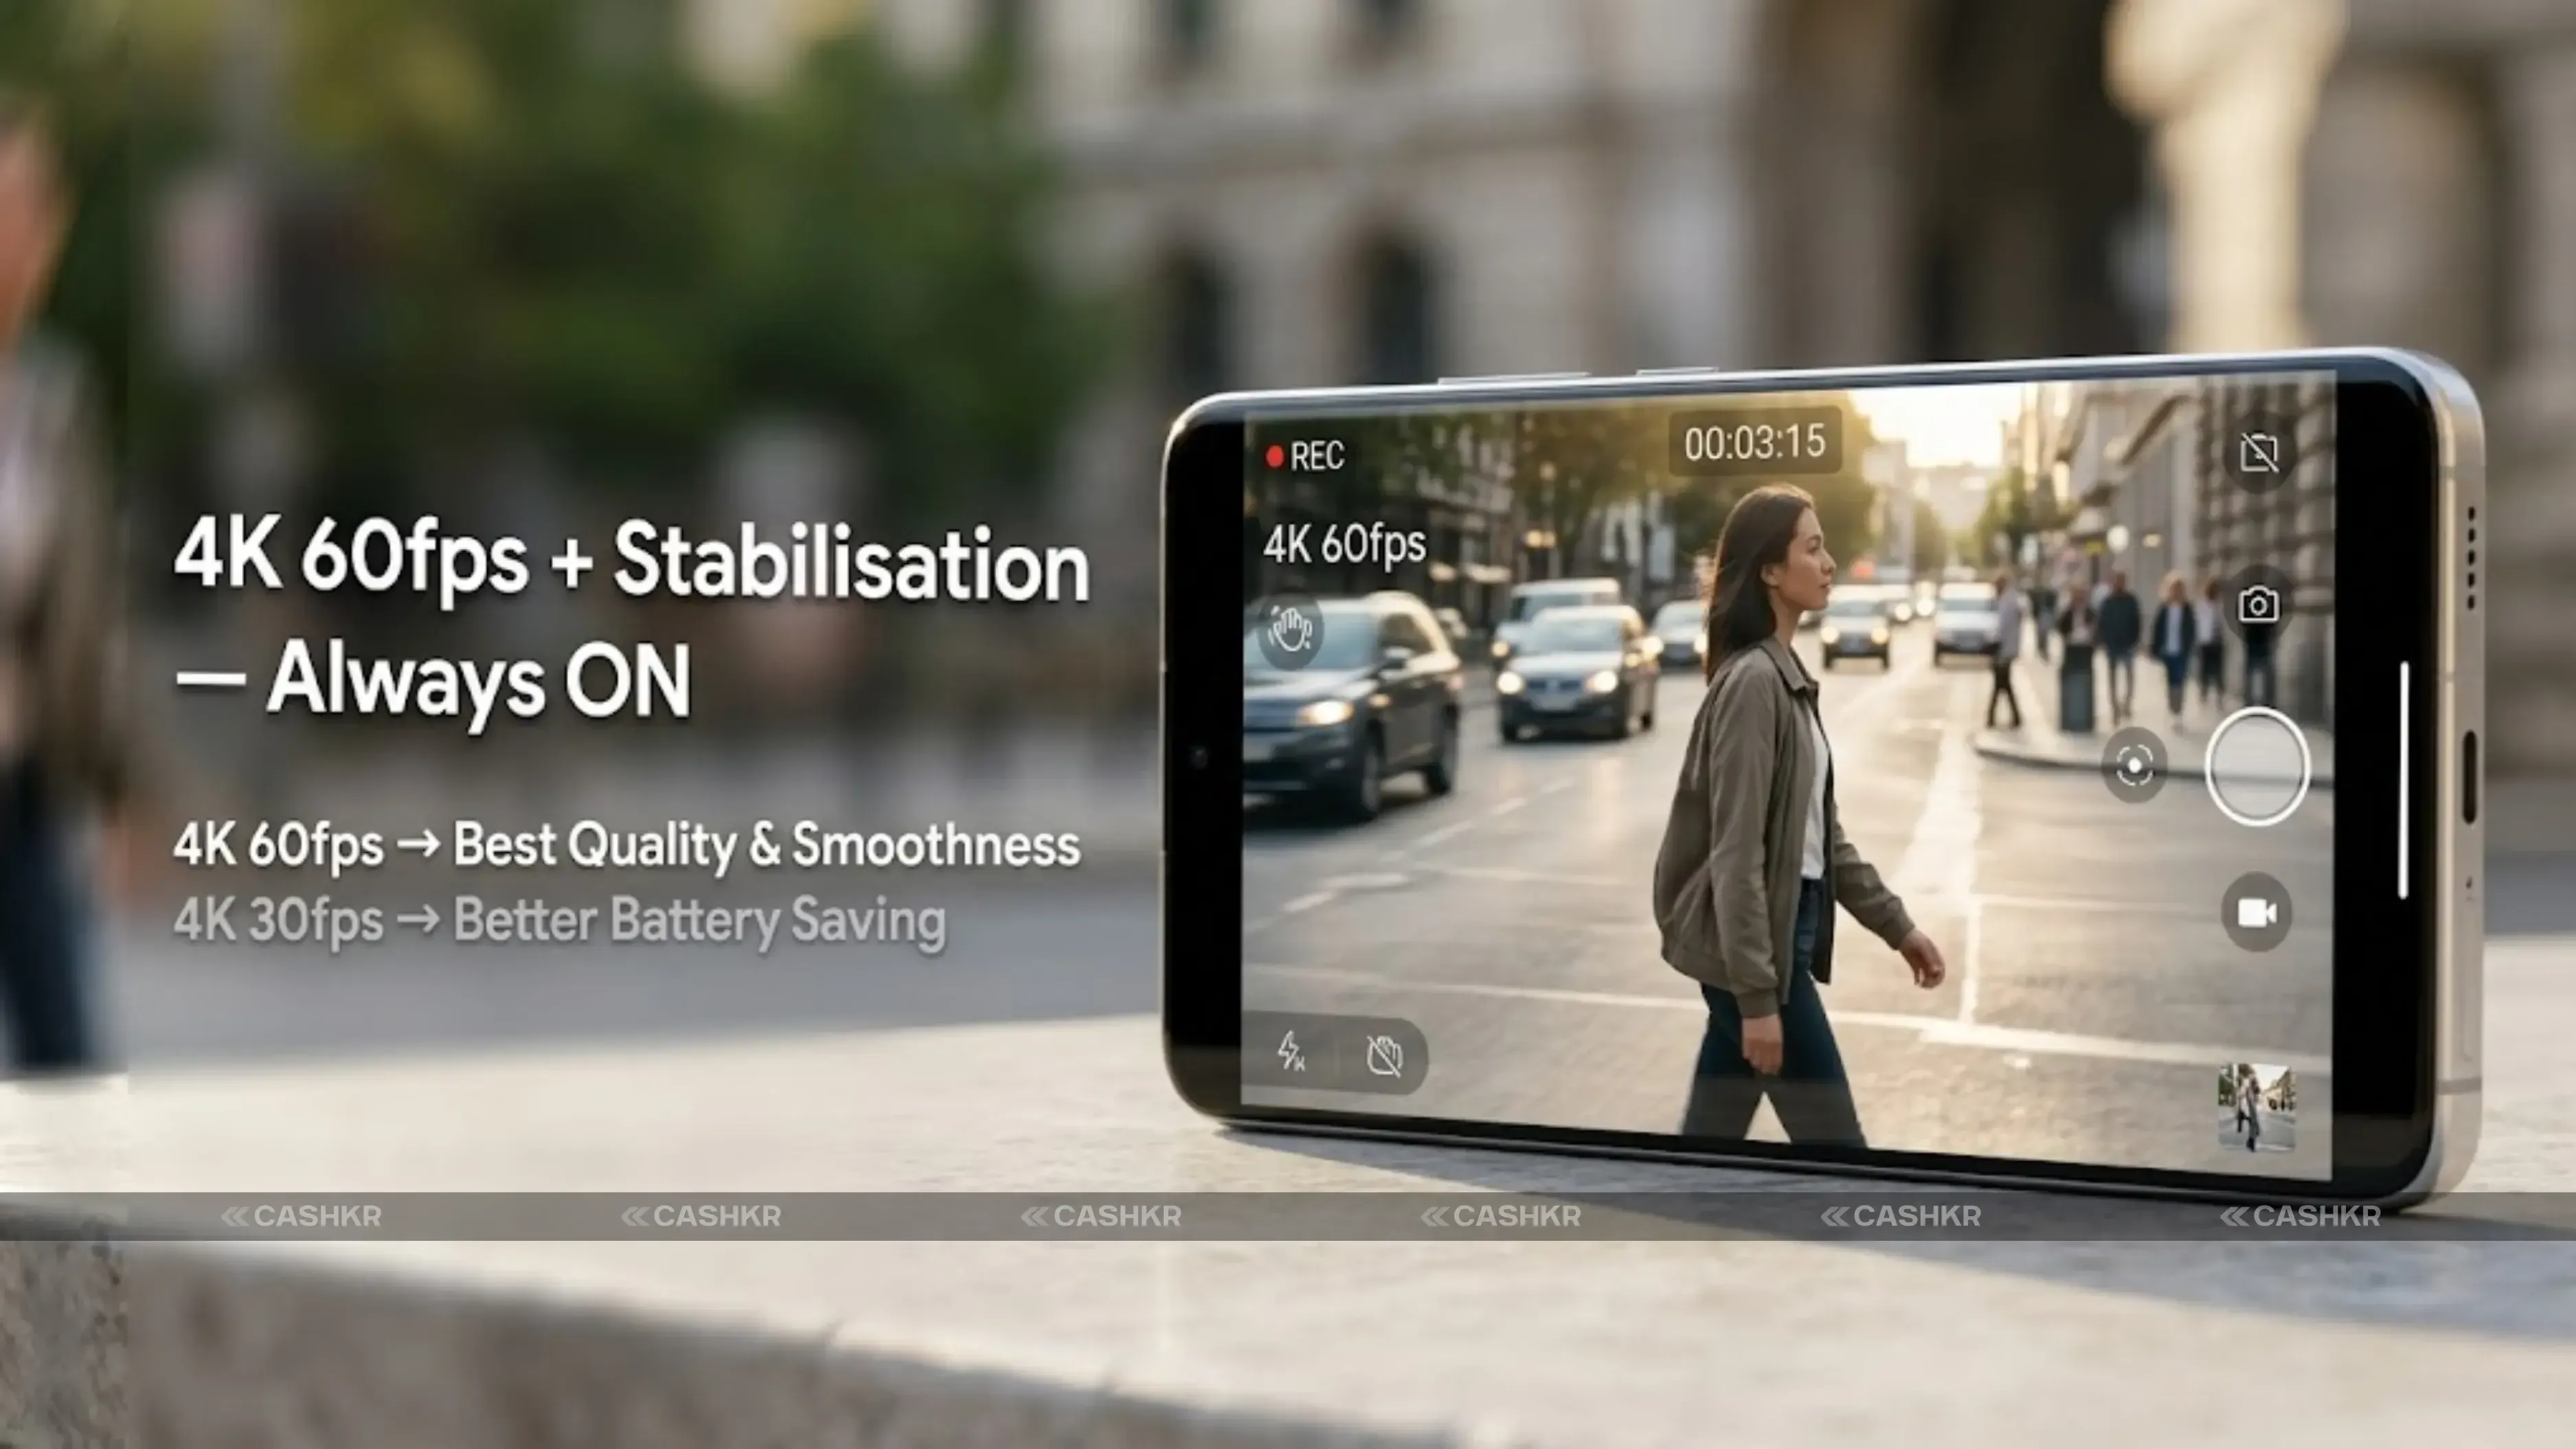
Setting 6: Video at 4K 60fps With Stabilisation On
4K at 30fps works well for still subjects when your phone is on a tripod or stable surface. If you’re moving while filming, 60fps makes motion look much smoother because it captures twice as many frames per second.
The Vivo X300 can record in 8K, but this isn’t practical for everyday use. 8K files are huge and need a powerful computer to edit. Most platforms don’t support 8K, and most screens can’t show it. Only use 8K for special projects where you really need the highest resolution.
Setting 6 4K 60fps + Stabilisation Set video resolution to 4K and frame rate to 60fps. Enable both OIS and EIS stabilisation. Use 4K 30 fps only for stationary shots where you want to save storage space.
Setting 7: Pro Mode for Creative Control
If you want a creative look in low light, instead of the polished Night Mode result, use ISO 800 to 1600 and a slower shutter speed. You’ll need a tripod or stable surface. This keeps the natural grain and mood of the scene.
Setting 7 Pro Mode Use ISO 100 to 200 in daylight. Use ISO 800 or higher in low light with a slower shutter speed. For light trails and creative long exposure shots, use a tripod and shutter speeds of 1 to 10 seconds.
Setting 8: Enable Stabilisation for All Video Recording
Go to video settings and confirm that stabilisation is turned on. On the Vivo X300, this appears as a toggle in the video recording settings. The default may be off or set to basic stabilisation rather than maximum.
Choose the highest stabilisation level you can. For walking shots, this turns shaky footage into smooth, professional-looking video. The only downside is a small crop at the edges, but you’ll hardly notice it in the final video.
Setting 8 Video Stabilisation Go to Video settings and enable stabilisation. Set to the highest available level for walking shots. Accept the slight frame crop as the trade-off for dramatically smoother footage.
Best Settings by Shooting Scenario
| Bright daylight | Photo mode + AI Scene ON | Keep ISO low, let phone decide exposure |
| Night streets | Night Mode | Hold steady or use a surface for best results |
| Indoor low light | Night Mode or Pro Mode | ISO 800 to 1600, slower shutter |
| Portraits | Portrait mode, 50mm or 85mm | Avoid ultrawide, use natural light |
| Documents and text | Ultra HD 200MP mode | Hold still, good lighting needed |
| Landscapes | Ultra HD or standard + AI ON | Use tripod for sharpest results |
| Reels and Shorts | Micro Movie mode | Use AI framing suggestions |
| Video walking shots | 4K 60fps + stabilisation ON | Enable EIS for smoothest output |
| Video stationary | 4K 30fps | Saves storage, still excellent quality |
| Light trails or fireworks | Pro Mode, slow shutter | Tripod essential, ISO 100 to 200 |
Mistakes to Avoid on the Vivo X300 Camera
The biggest mistake is leaving the camera in default Photo mode and never trying Night Mode, Portrait focal lengths, or 4K video. The Vivo X300’s great hardware is wasted if you only use the default settings.
Main Camera | 200MP ZEISS lens |
Telephoto | 50MP periscope, 3x optical zoom |
Ultra-wide | 50MP, 119-degree field of view |
Front Camera | 50MP |
Default Output | 12.5MP pixel-binned (16-in-1 pixel binning) |
Max Resolution | 200MP in Ultra HD mode |
Video | Up to 8K recording |
Recommended Video | 4K 60fps with stabilisation |
Stabilisation | OIS and EIS |
AI Features | AI Scene Optimisation, Night Mode, Portrait AI |
Final Verdict
ZEISS optics give you a strong base, and the AI processing adds results you can’t get by editing a bad photo later. But to get the most out of both, you need to set up your camera the right way.
Summary of 8 key changes: Night Mode in low light | AI Scene ON for most shooting | 200MP only for documents and crops | 50mm or 85mm for portraits | Micro Movie Mode for Reels | 4K 60fps for video | Pro Mode for creative long exposures | Stabilisation always on for video
FAQs
1. What is the best camera mode on the Vivo X300 for daily use?
2. Should I always shoot in 200MP on the Vivo X300?
3. What focal length should I use for portraits on the Vivo X300?
4. How do I improve low-light photos on the Vivo X300?
5. What video settings should I use on the Vivo X300?
6. What is Pro Mode on the Vivo X300, and when should I use it?
7. Does the Vivo X300 have video stabilisation?
8. What is Micro Movie Mode on the Vivo X300?
9. Why do my Vivo X300 photos look grainy in low light?
10. How do I shoot light trails and long exposure photos on the Vivo X300?
Sell with Cashkr
Got an old phone, laptop or tablet lying around?
Cashkr buys used devices at a fair price with free doorstep pickup and instant payment across 40+ Indian cities. Get an upfront quote in seconds.
Yaskar Jung Shah
Senior Tech Writer
Yaskar Jung Shahis a technology enthusiast with over 5 years of experience covering AI, machine learning, and has contributed to major tech publications worldwide. He holds a Master's Degree in Computer Science from leading institutions.